Showing posts with label before&after. Show all posts

Monday, April 4, 2016

nailtiques review

first impression and honest review for

nailtiques formula 2 plus
$9.50

in mid february i discovered nailtiques formula 2 plus.  my nails are typically thin, peel and break super easy.  just as i get them to grow, they break.  i usually would wear them short to avoid random breakage and to make my manicure last.  it never failed to paint my nails and then the very next day have them chip because my nail was to weak and would bend or break causing the polish to chip.  it was annoying.

i purchased formula 2 plus in february.  it states on the packaging to only use the formula once a day.  so, the first week i had it, i took my old polish off, painted a thin coat of the formula and let it dry.  the next day i'd paint another thin coat on top of the day before's thin coat.  and i repeated this process for about 5 days.

on day six, i decided i wanted to paint my nails.  so, i removed all of the layers and then removed my cuticles using sally hansen cuticle remover and a cuticle pusher.  i used nail polish remover again to clean my nails of any residue of the cuticle remover.  filed and shaped my nails.  and painted a thin coat of formula 2 plus.  i let that dry for a minute or so and then painted on my base coat of nail polish.  after that dried for a minute or two, i put on two coats of nail polish (letting the first coat to dry a little before applying the second).  topped off my nails with a clear top coat.

i normally paint my nails once to two times a week depending on the nature of the polish (if it chips, nail breaks, starts to look rough..) whenever i change my polish, i follow the same pattern as above.  if i paint my nails, i never reapply the formula.  i only reapply the formula throughout the week if that's the only thing on my nail.  i have never tried to use it as a top coat so i am not sure if that would change any of the results.

but after 6 weeks of using the product, my nails have grown so much.  they're stronger.  they still tend to bend occasionally but i don't feel like they're going to break and my polish doesn't chip as often.  on my thumb nails, they always seemed to break on the outside corners, same place every time.  since using nailtiques formula 2 plus, i haven't noticed the normal breakage on my thumbs.  my nails have peeled a little between polishing but not nearly as much as before.  and i finally have natural nails that peak over my finger tips that i can see when i'm looking at my palms.  my nails have never been able to grow this long and stay this long.  and the best part is that my polish isn't chipping as often so my manicure is staying beautiful longer and is requiring me to paint my nails less.  i don't use gel nail polish unless it's a cheap brand from the drugstore that doesn't require a light.  i don't use acrylic nails.  this is my natural nail growing due to using nailtiques formula 2 plus.

here is my review broke down in pros vs. cons:

pros:

  • nails are stronger
  • not as easy to bend
  • not as easy to break
  • peeling is less - still happening though
  • nails are longer than ever before
  • manicure is lasting longer than a day - lasting up to 4-6 days with normal every day polish
cons:
  • nails are still peeling a little - but much less than before
below is the the before and after of my nails:

before
after

after

Thursday, March 31, 2016

loving tan

my first impression of loving tan

loving tan express tan in dark $39.95 w/o tax and shipping&handling.


for my bridal shower, i wanted to be tan.  we had a local tanning salon in my tiny town that closed right before the shower and so i wasn't able to tan like i normally would.  (which i don't really tan by tanning beds that often.  but will if i need to for a special occasion).  i like to do self tanners but i hate the smell and the process and sometimes you don't come out looking right.  i had heard about loving tan from youtube and thought i would check them out.

loving tan is based out of australia but have finally made it over to the states so that shipping isn't an arm and a leg and doesn't take forever to get to you.  what really got me interested in the product is the express tan option.  (only comes in medium or dark.  i purchased dark). the express tan states that you put on the self tanner mouse and then sit for TWO hours and then wash it off!!  um, yes.  get in my cart.  get on my body.  i love the idea of only having to feel sticky, uncomfortable and smell like a nasty chemical for two hours and then be able to wash it all off.

to start, i took a shower and exfoliated my whole body.  i went in with a light body lotion on my dry areas (hands, feet, elbows and knees) and i let that soak in for a few minutes.  i used a tanning mitt to rub the product on my body.  it dries quickly.  it has an instant bronzer that i used as a guide to make sure everything was blended and evenly covered.  the bronzer is amazing to even just wear on its own.  not blotchy at all!  when it came to my face, neck, hands and feet, i used a synthetic elf brush and pumped the tanning solution on the brush and then blended it on my face or whatever.  it states to wash your hands after an hour to prevent from overly tanning them.  but i didn't do that (rebel) so, i did notice my hands - especially around my knuckles - were a little bit darker than the rest of my body.  but it wasn't terrible.

i let everything dry for a few minutes before i put on loose clothing.  i just sat on the couch for 2-3 hours and then washed my body off.  i made sure to only wash myself with my hands and to avoid loofahs or washcloths.  i noticed i was a shade or so darker than normal.  nothing outstanding. but i wasn't disappointed.  i felt like the tan was even.  i felt like i looked like i had color to my skin instead of my normal pale coloring.  and i felt like it was a believable tan color (not orange).

below is the before and after of my legs in my bathroom lighting.

here is my review:

pros:

  • i like that it takes 2 hours to develop so that i can quickly wash it off and get on with my day
  • the coloring is subtle so it doesn't look so fake
  • the color is a believable tan - not orangey at all
  • instant bronzer is a great guide, non blotchy, OK to be worn on it's own if i didn't have 2 hours to waste before i could shower
  • smell isn't terrible when i first put it on but did notice the normal tanning lotion odor towards the end of the 2 hours
  • blends easy
  • fast drying
  • fades evenly (i've had it on for a week and didn't lose my tan in a blotchy, weird pattern.  it all seemed to wear off evenly.  no exfoliating involved)
  • still some color to my skin a week later
cons:
  • the express tan doesn't come in ultra dark (i have only tried this express tan in dark.  i am not sure how the normal lotion works/wears nor how medium or ultra dark appears on the skin)
  • only gain a shade or 2 in coloring - may have to apply a few times to get the dark tan you want
  • a little pricey at $39.95 for the bottle of express tan
  • did rub off on my bridal shower dress (wore the dress from 4p-12a and noticed tanner on the armpit of my dress and on the seems around the neckline and armpits on the inside of the dress.  washed it in my washing machine with normal detergent with other similar garments and it came right out.)
below is the before and after of me in natural lighting (in front of a window)  only looks like a gained a shade or two darker than my normal skin tone.  however, it does give me a warm glow and i was happy with that.


 overall, i would purchase it again.  and i will be using the remainder of this bottle in the future.  i like the warm glow it gave me and i liked that it wore off evenly so i didn't look blotchy or discolored a week later.  i would highly recommend this product to anyone just wanting to have a warm glow or be a couple shades darker than normal.  and especially to someone who hates the self tanner process like myself!  what self tanners have you used that you would recommend? or how did you feel about loving tan?

Wednesday, January 27, 2016

guestroom: star wars room

when i asked matt to move in, he said that he would only move in if he could hang his yoda picture some place.  now, i would be lying if i said i loved star wars.  if i even knew who yoda was.  and if i didn't think, perhaps you should hang that picture in the garage.  however, marriage isn't about just me.  it's about compromise and making the other person happy even if it doesn't make you happy.  so, i said he could make the guestroom a star wars room.  BUT i will decorate it so it doesn't become some nerdy kids wet dream.  it had to look grown up and classy.  and a little nerdy.  i guess.

so, we started off with a blank slate.
my niece exploring the new house

and so of course, we painted 3 walls light grey and one navy blue.  it kind of mimics the guest bath. and i put in the bed i inherited when my grandfather passed away.  which is just a full size bed with a wooden frame.  apparently, this was my grandparents bed when they first got married many moons ago.  and i like to keep old things that have been passed down.  but anyways, we started with that bed.  and to keep it looking 'adult' i went with just all white bedding throwing in a few accent pillows in grey or navy.

i also used my old dressers from my room when i was a baby.  originally they were white with 'wood' accents and little yellow flowers painted on the drawers.  matt painted the white parts navy.  however, we did no sanding or priming so we're finding that the navy paint keeps chipping.  however, we eventually may buy new dressers down the road and were just using these for the time being.

i got a small side table from my mamaw that i used as a side table for the bed.  it currently is storing a lot of my scrap-booking material.  but on top, we stacked some books and put matt's old touch lamp on them.  (it was perfect that it was navy!) and i printed off some prints with our wifi password and a small sign saying "be our guest"

on the other side of the bed, i found a small shelving unit at a discount store.  on this, we have a star wars lamp that matt and i made.  we purchased a small lamp at the dollar store.  and we went to a local flea market and bought some old star wars toys.  matt glued them around the base, stacking the characters as he went.  and i just spray painted the entire thing silver.  i think it turned out pretty well.  we also have some more star wars pictures i found on pinterest that i just printed off and framed.  i painted some tiles with star wars characters to be used as coasters.  on the next shelf, i bought a large glass container and filled it with sample size toiletries in case our guests ever forget anything.  and we stacked some of matt's star wars books next to that.  on the bottom shelf, i just placed some towels and wash cloths for our guests.

above these side tables, i printed off more pictures i found on pinterest of star wars characters and framed them.  i chose pictures that were more pop culture than a basic star wars poster.  i feel like that helps make it look more 'adult' than child like.  i also loved that i found the picture of han solo and princess leia that mimic the old drawing by norman rockwell.  my parents have had this picture hanging in our house for all my life.  and i like that i could bring that to our home.

we also included the mirror matt and i made over the summer in the corner.  i always hate going and staying someplace and they don't have a full body mirror for you to use.  i like to know if my outfit looks OK before i leave the house.  and i hate when i don't have that option.  so, i wanted to make sure i included one in our guestroom.

right now, this room is taken over with boxes of wedding stuff.  but i think it turned out nicely.  i'm not sure how often it'll actually get used.  but it was a good compromise for matt and i.  and i believe it really made my house his home.


the picture that started it all

Tuesday, January 19, 2016

glitter bottles

i wanted inexpensive centerpieces for our wedding.  my theory is that no one cares about what's on your table.  i couldn't tell you what was in the middle of anyone's tables of any of the weddings i've been to.  except for the one that i went to and the centerpieces were so huge you couldn't see the person sitting across from you.  what the heck is that.  and since our budget is on the smaller scale of weddings, i didn't want to put too much of our budget towards the centerpieces when i could put that money towards more important things like alcohol.  duh.

so, my plan was to use wine bottles and beer bottles.  i ordered plain bottles without labels from a bottling website so i didn't have to deal with labels.  however, we did drink some wine and beer to make up some extra bottles.  to get the labels off of these, we put the bottles in boiling water in a large pot on our stove and let them steam for awhile.  we were still stuck with having to peel the labels off, scrubbing the tough spots that wouldn't give and still having glue residue on some of the bottles.  our next attempt was to put them in the sink in really hot water for a really long time.  but again, same frustrating results.  the only bottles that were easy to remove the labels from were miller lite in their new old school style bottles.  and after we reached the quota of wine bottles per table, the remaining extra bottles we just spray painted flat black even over top of the labels and then i just used the labels as a guide to write our hashtag on for later picture posting.

but this post is about the glitter bottles.  not my entire centerpiece.  so, i'll save the details for that later and get in to this glitter bottle extravaganza!

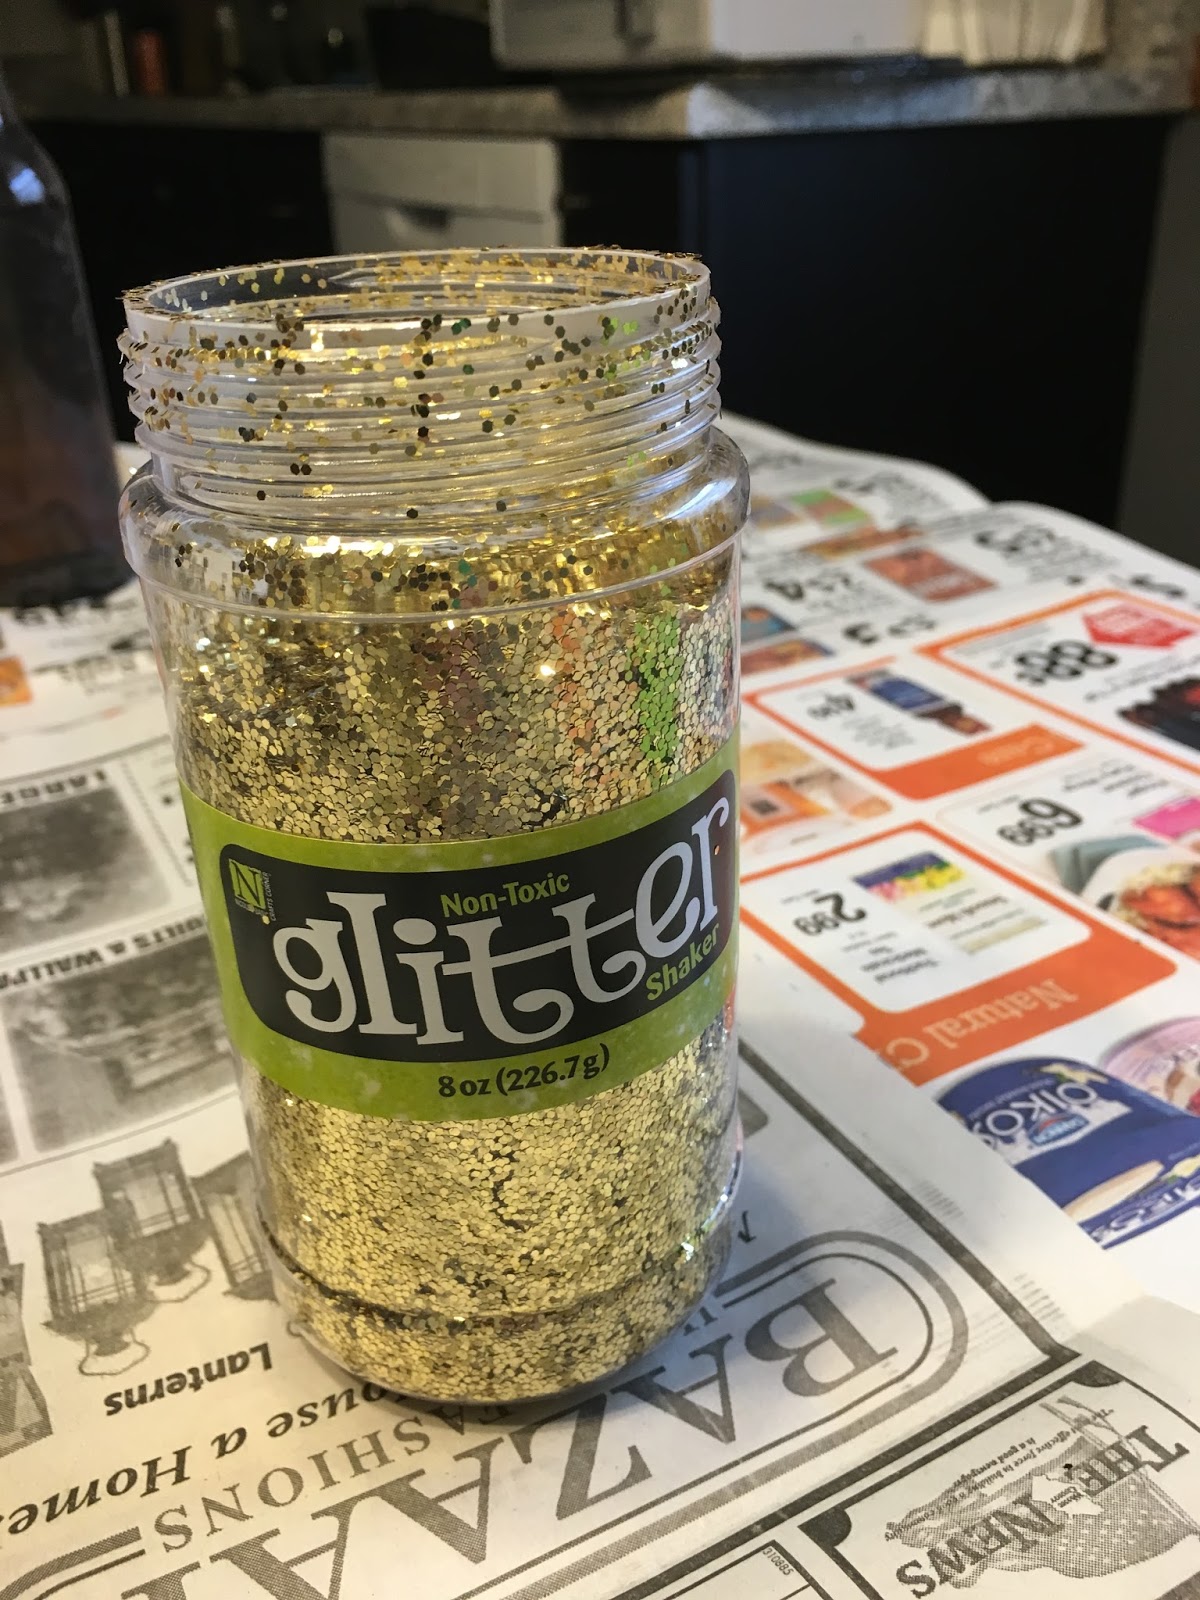
we'll have about 20 tables at our wedding reception.  so i purchased/drank 24 beer bottles specifically for glittering.  i mostly used beer bottles that we drank and rubbed the labels off of.  since having any residue on the bottles wouldn't be an issue with a heavy layer of glitter to mask it.

you will need bottles of any kind of your choosing.  for this we have beer bottles.  glitter.  we chose a more chunky glitter that you can buy in large quantities at the craft store.  modpodge.  i chose the glossy kind to give it an extra glossy/shiny/glittery appearance.  sponge brushes.  newspaper.  paper bowls.


since most of these bottles had labels on them, we went through the process of steaming the labels off.  i didn't clean our bottles with anything after the removal of labels.

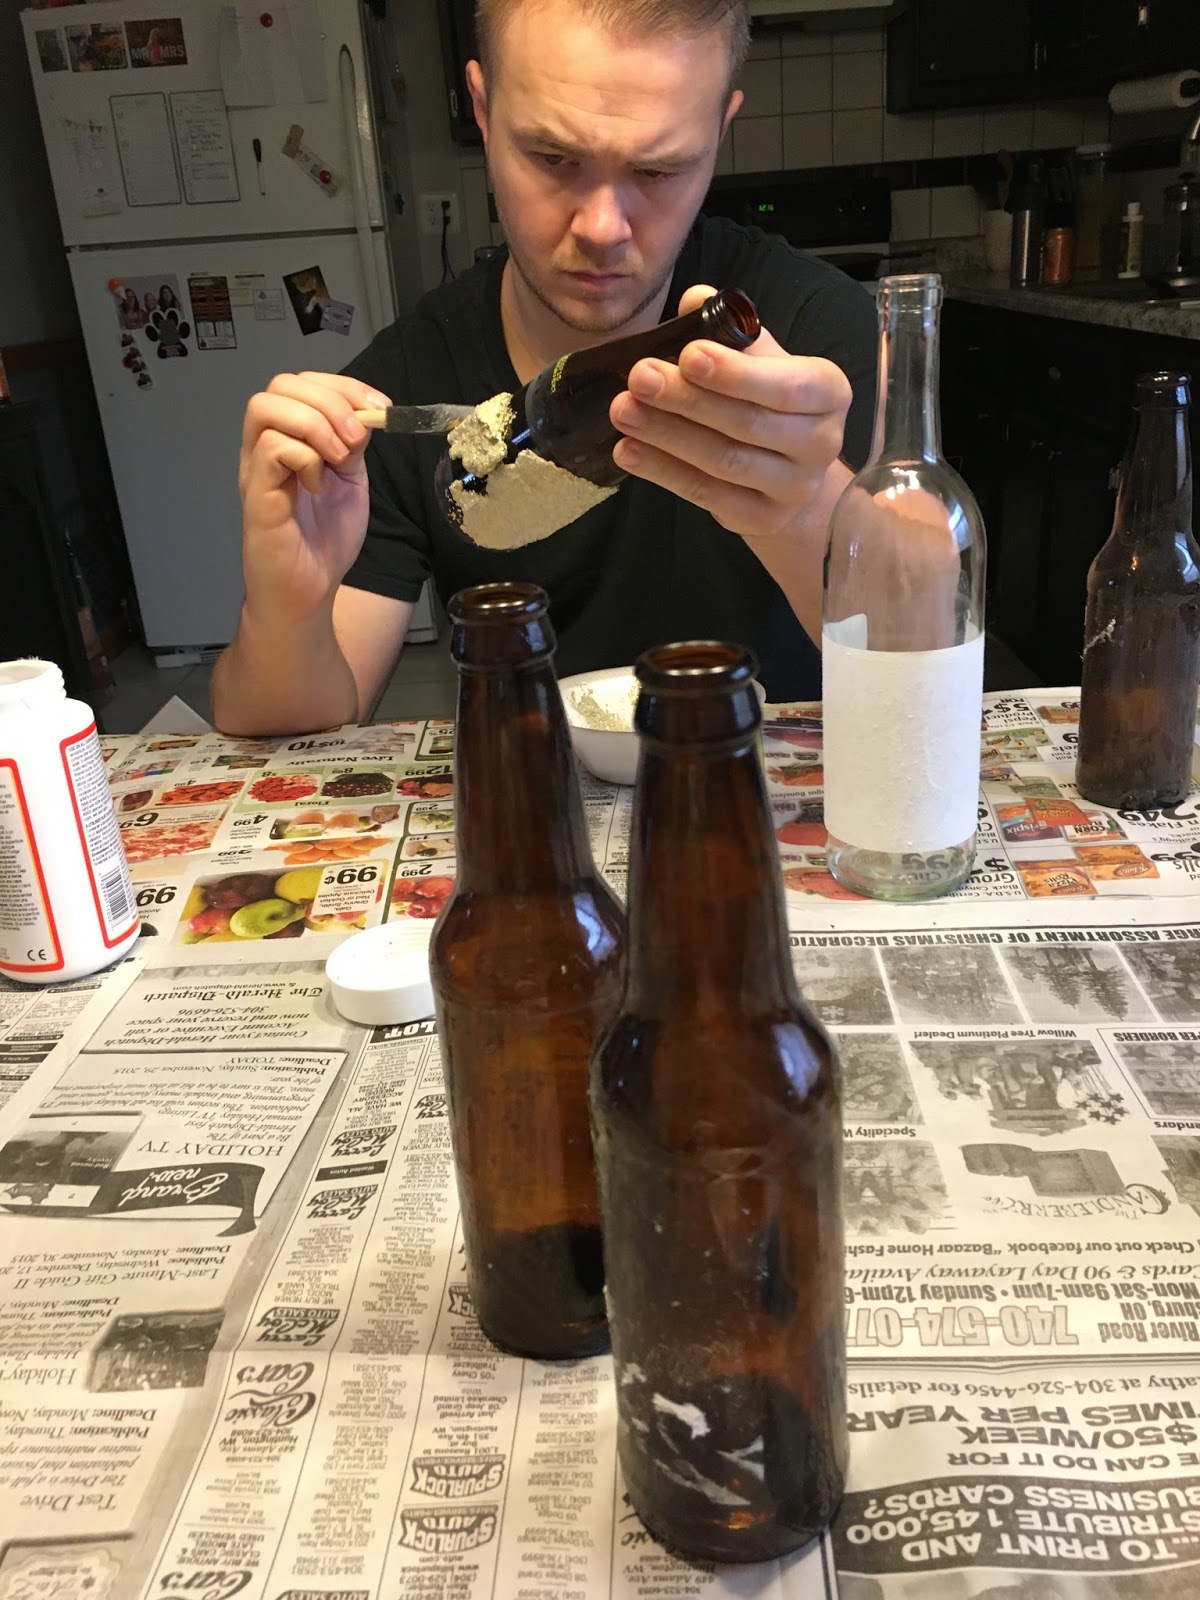
in the bowl, i poured a small amount of glue in and then completely covered the base of the bowl in glitter.  i mixed it up and looked at its consistency.   you're wanting it to be just a tad wet but mostly glitter than glue.  you'll need it to be wet enough to stick to the bottles but you want the glitter to be thick enough that you can do this in one layer.
a little bit of glue

a lot of glitter

mix until it looks like this

after mixing the glue and glitter to the right consistency, you just use the sponge brush to paint it on the bottles.  i would get a large glob on my brush and then put it on the bottle and use the brush to kind of mush the glob around to get somewhat of an even coat.


some of our bottles aren't very even or smooth.  and that's OK.  for us at least.  i let them stand over night to completely dry.  and there is your glitter bottles.
i'm using fake flowers for our centerpieces (and our bouquets) so in these, i'll just be putting a single white rose.  i'll have a large wine bottle with a white rose and some leaves.  and then i'll have a black beer bottle with our hashtag painted on with some greenery.  i'm going to add a few more key pieces to really bring the centerpiece together and make it look more expensive than just spray painting bottles.  but that's for another post!

Monday, September 14, 2015

laundry room redo

the bonus room that was created out of the garage included the bonus room, full bath and a laundry room.  the laundry room is on the back of the house which would have been the back wall of the garage.  it was a basic room with yellow walls and my water heater.  nothing special.

before:


my mom and dad painted it just like every other room.  and matt had a washer and dryer in storage from when he moved out to st louis for chiropractic school. (SCORE!) they're old machines he purchased at a yard sale but they work.  eventually i'd like to get new appliances but we may wait until we move in to our forever home or until these break.  we also had some wood shelves that we removed from various closets that matt hung above the appliances for us to store detergents and cleaning supplies.  the white baskets used to organize our cleaning supplies were purchased at home goods.

on the back of the door between our bedroom and the laundry room, i hung a rack that we use to store our wet jet supplies and sewing kits.  by the door to the garage, i purchased a rack to hang our brooms on and in the bags are rags we use for cleaning.

finally, in the small space between the washing machine and the side wall, we installed the old cabinet from the mauve master bathroom.  the counter top is what was leftover from what i purchased for the kitchen.  apparently when you buy counter tops you have to buy a certain length and whatever is not utilized is extra that you just get to keep for whatever??  who knew??  so it fit perfectly in this small space to store our laundry baskets.  there is about a foot or so between the counter top and the back wall that we just store our swiffers and floor steamer.  overall, i think the small space became a cute little laundry room.


also on a side note, our whole house is hardwood and tile.  i found that just sweeping up the dust and dirt wasn't cutting it.  and it appeared that every day more dust and dirt would appear around the house.  i wanted a better option to keeping my floors clean.  matt had brought a long with him a large sweeper that is great for our rugs but wasn't so great for our wood floors.  it did have the option to run on the hardwood but i noticed it was scuffing them up while i was running it.  and not to mention how bulky and heavy it was for lil ol' me.  so i wasn't keeping up with sweeping with that thing.  i wanted something lightweight, something that worked and wouldn't break the bank.  i did some research online and found this Bissell Hard Floor Expert Vacuum.  the price was very reasonable.  it's so lightweight that i can carry it around the house with one hand!  (i have zero upper body strength) and it sucks up everything!  if you have hardwood floors, i would highly recommend this vacuum!


Tuesday, September 1, 2015

diy: mirror

so, i had this old mirror that used to hang in my old bedroom at my parents.  i originally didn't want to keep it and left it there to be sold in the rummage.  however, it didn't sell and so i brought it to the new house.  i decided i wanted to create a free standing mirror to mimic the one i have in my closet for the guestroom.

i have always hated staying at other people's homes or traveling to hotels where there is no full body mirror available.  how does one know if their outfit is awesome!?  and so, if we ever have guests, i wanted them to be able to see how pulled together they are.

so, first things first.  gather supplies!


matt and i bought 3 pieces of wood at the local hardware store.  i had some left over stain from a previous project and the beautiful mirror.

matt measured my free standing mirror in my closet to decide the length of our wood pieces.  he came up with 66 inches.


once the pieces were cut, he drilled some holes and used these brackets to adjoin the boards.  after putting 2 boards together, we decided that we didn't need the third board.  (which is fine for me..  i have a future project for that board!)


 and sanded the ends he had to cut.


 once all the handy man parts were complete, i helped him stain the wood.


 once we put the mirror on the stained wood, it looked so plain and boring.  my free standing mirror is mostly mirror with a 2 inch frame.  this small mirror and thick frame wasn't the look i wanted.


so we decided to use some of the leftover navy paint from the guest bathroom and guestroom to give it some character.  after much discussion, matt won with diagonal stripes.  and i won on how many navy stripes to do.  compromise.  by this time, it started to rain so we had to move the project in to the garage.  we used painters tape to tape off the sections we wanted to paint navy.  we used sponge brushes and lightly painted the navy so that the stain and wood would kind of show through.


we were both pleased with the way it came out.  (yay compromising!)  after everything completely dried, matt attached the mirror to the boards using mirror clips.  

and here is the final product:


we are going to prop this up in a corner of the guestroom.  i do like the look.  i like the stained wood and navy combo will match the furniture in there. however, the height of the mirror on the boards is perfect for me at 5'1"..  matt at 5'11" can't see anything above his shoulders.  so, if we could have done it again, i would have attached the mirror a little higher since he will be the one to use the mirror most often.  (his clothes are stored in the guestroom since the "master bedroom" we created out of the bonus room didn't come with a closet.)  in order for him to use it, he has to lean it against the wall at a harsh angle causing the mirror to come out too far in the room than i would like.  we'll have to play around with a compromise on that..  but for the most part, i think it turned out better than expected.

puppy tax:


just like her momma, obsessed with her reflection :)

Tuesday, August 25, 2015

curb appeal

this house had very little curb appeal when i bought it.  i know if i ever want to resale it i would need to make it look appealing to the average buyer.  thankfully my mom has a green thumb and was able to help in picking out flowers and teaching me what to do.

before, the house had a huge christmas tree in the front yard blocking a window and a portion of my porch.  this mad the house look a lot smaller than it really is.  an old basketball hoop stood off from the driveway.  the backboard was broken.  and i didn't want all the neighborhood kids coming to play in my yard.  there were no flowers or any other kind of plants/trees in the front.  the backyard was a clean slate too.  absolutely nothing was in the backyard.

BEFORE

BEFORE
BEFORE

BEFORE
so, we removed the christmas tree and the basketball hoop.  which made the house look so much better from the street!  mom, matt and i spent one sunday digging out a flowerbed in front of the front porch.  i wanted something more unique than just a straight line so we went with a wavy pattern.  i love that it adds a little character to the normal flowerbed arrangement.  

to cover the remaining pole we couldn't remove from the hoop, we got a large barrel and planted some flowers in it.  mom also planted some flowers around the mailbox.  we also planted a tree out front.  though i'm not sure if we'll live in this house long enough to enjoy any shade from it.

between the sidewalk (leading from the driveway to the porch) and our house is a brick flower bed that was just full of gravel.  we put 2 large ferns down in it.  matt's mom also bought us 3 ferns to hang on our porch.  we also added black shutters around the windows and replaced the porch light.  

eventually we want to replace the screen door to a full view screen door so the little puppy can see outside.  and i'd like to have a black front door.  we want to take the current front door and replace the door that goes from the laundry room in to the garage in the back because the current door back there has seen better days.  also, when we have the money, i'd like to buy nicer front porch furniture.  it is nice to sit out there in the evenings as the sun sets on the back of the house.

AFTER

AFTER

AFTER

in the backyard, mom created a flowerbed around the garage (white siding area).  we planted a tree in the middle of the backyard.  in the back corners of our lot, she planted a garden on one side and a butterfly garden on the other.  by the butterfly garden, is a small slab of concrete.  i'm not sure exactly what it was used for before - maybe the base for an outbuilding?  but it is very small.  currently we have a small chair and table sitting on it (really all it can hold).  the butterfly bushes aren't really attracting a lot of butterflies but i'm hoping next summer we'll be more successful.

the garden grew quite a bit of tomatoes, a single pumpkin, green beans and some onions.  our dirt is more sandy and i'm not sure if more veggies would be successful in growing in boxes with real soil than sand?  our plan next year is to build some kind of boxes to put our veggies in.  we'll see which is better.

on the side of the house next to the garage is our gate.  the ground underneath the gate was like a valley and the pup could crawl underneath it and get out.  to fill that, matt and dad used the dirt from the flowerbed by the garage.  they had to dig out a hole large enough to put a pipe in it to pull the rain water away from the house.  that dirt was enough to fill in around the gate and now the pup can't escape.

finally, we don't spend too much time sitting out back because our neighbors have a huge pig in their yard!  any time the wind blows a certain way we just smell hog poo :( buuuuuuut, eventually when we have the money, we want to cut the window out that goes in to the kitchen to make a back door and install a patio so we could enjoy the backyard one day.

AFTER
AFTER

LOU ENJOYING THE BUTTERFLY GARDEN
AFTER

NEIGHBOR PIG
the front yard before and after: